If you’re an audio professional, announcer, producer, or content creator, you’re probably already familiar with the concept of ducking, even if you don’t know the technical details.
During a radio broadcast or when editing a voiceover, it’s necessary to strike a balance between the background track (background audio) and the voiceover. Generally, during a radio broadcast, for example, the announcer or the sound engineer makes this adjustment manually by gradually lowering the background audio whenever the announcer speaks and then raising it again. We can therefore say that this effect caused by lowering the background volume is known as ducking.
But what exactly is Ducking?
The ducking effect can be understood as the process of reducing the background volume (of the ducked signals) in response to the presence of another audio signal (the ducker).
Applying this to a radio setting:
Ducking: The effect of reducing the volume of one audio source in response to the presence of another.
Ducker: Announcer’s microphone (the audio source responsible for applying ducking to the ducked sources).
Duckeds: Background track (the audio source whose volume is reduced by the presence of the ducker).
Ducking in Aires Studio
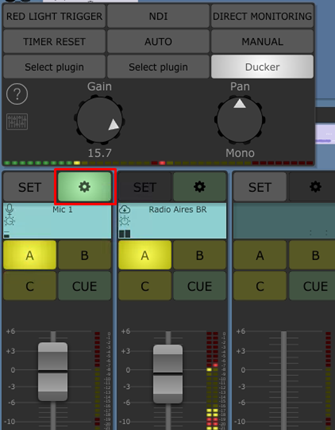
To add more dynamics to broadcasts in Aires Studio, you can configure the ducking function, allowing this effect to be applied dynamically during the broadcast.
By default, all microphone sources in Aires Studio are set to duck.

With this in mind, the other SOURCES on the same PROGRAM BUS (PGM) as the microphone will now behave as duckers; that is, they will be subject to microphone attenuation, lowering and raising their volume according to the parameters configured in the ducking control:
Level: Specifies the attenuation level that will be applied to the SOURCES Duckeds when the volume level of the SOURCE Ducker (Mic) reaches the value set in the Threshold option.
Threshold: The volume level of the SOURCE Ducker in dB, which will serve as the trigger for attenuation in the SOURCES Duckeds.
In the example shown in the previous image, the ducking effect will be applied to “Radio Aires BR” source when the volume level of MIC 1 reaches -41 dB. This will cause a moderate attenuation to be applied to that source, which will return to its initial volume 300 ms after the microphone audio is muted.
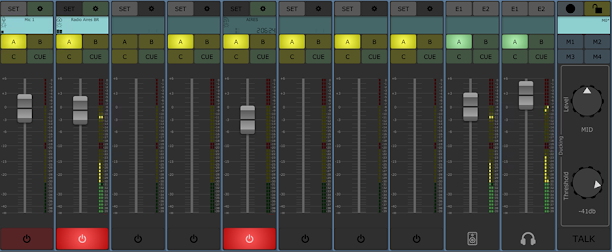
The Mixer track display allows you to visually monitor the application of ducking.
An icon displayed next to the audio modulation will move up and down according to the amount of attenuation applied.
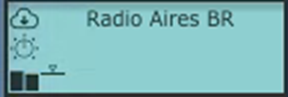
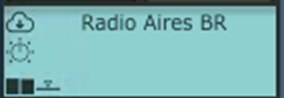
In image 1, the SOURCE is not being attenuated, while in image 2, the microphone audio is attenuating the SOURCE Radio AIRES.